Posts

Showing posts from April, 2024

Blossom Bunches Mother's day card

Image
Mother's day has always been tough for me. I lost my own mother when I was young but it doesn't keep me from enjoying making Mother's' day cards to honor her! I've always felt that I got my creative gene from her. One of my earliest memories was being at her knee while she was making an paper owl that was framed that hung above our mantel. Miss her a lot! Anyway, I've been in love with this technique lately of dragging black ink over these gorgeous Blossom Bunches 3d embossing folders from the new Simon Says Stamp Celebrate release. I have a reel over on my instagram page that shows a bit of this process. I began with a panel of white of cardstock that I ran through the die cut machine using the new embossing folder. I flipped it over and added ink to the de-bossed side. (valley side)  I then used a black ink pad that was a bit raised to drag directly over the embossed and inked panel to make the colors pop! It creates this gorgeous background for my card. Yes,...

Impression Obsession Anything Goes

Image
Hi all and welcome to another week of the  Simon Says Stamp Wednesday Challenge . This week's challenge theme is Anything Goes! We are featuring products from Impression Obsession . You don't have to use them to join in but if you have some we would to see what you make. As always just for entering you will be eligible for the drawing of a  $25 voucher to the Simon store . Just so happens I needed another wedding card! For this challenge I will be using the Impression Obsession Mr & Mrs die set . Lot's of love flowing over here! I made this card using an A2 size card base from smooth white cardstock. I then trimmed down another panel of white cardstock to leave a bit of a border to create my background. Using a layering stencil, I was able to create a lovely soft background for my wedding card. I used yellow and gray die inks to ink blend the floral images. I then inked the edges and "flicked" gray ink on the stenciled panel. I die cut the Impression Obsession...

Simon Says Stamp Celebrate release Blog Hop - Day 1

Image
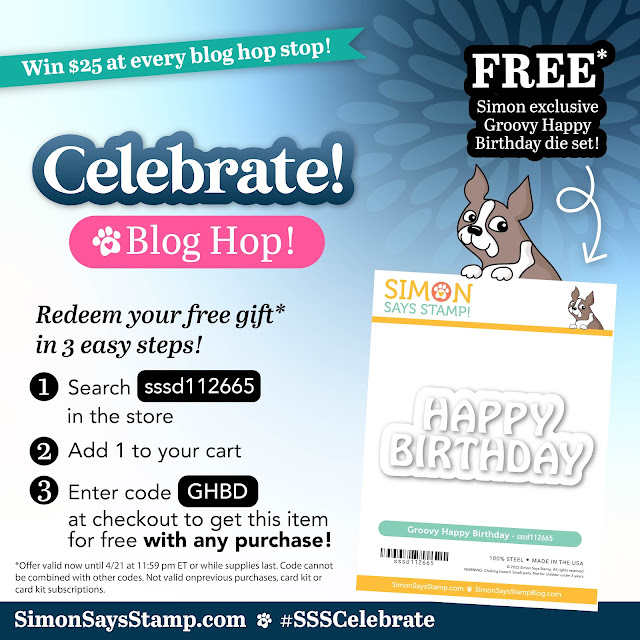
I'm happy to be participating in day 1 of the new Simon Says Stamp Celebrate blog hop. I am sharing a project using goodies from this new release . Check out the special hop promotion! 👆👆👆Also, Simon is giving away a $25 shopping spree to a lucky winner! The winner will be picked from the comments left along the hop. Each comment you leave will be an entry into the drawing.  REMEMBER:  If you want to leave a comment on this post, make sure you include your name so we can reach you if you are selected for the giveaway!  This card was super easy to make! I used an A2 size card base cut from smooth white cardstock. I then trimmed down another white panel and scored it every half inch and then dragging the distress ink pad directly over the panel to create a woodgrain background. I then die cut several of the flowers from the coordinating dies for the new Flower Power stamp set from scraps of colored cardstock. I adhered them to the woodgrain panel with foam squares...

Simon Says Stamp Celebrate release day

Image
It's release day! I'm happy to be sharing a project I made with some of the amazing items from the new Simon Says Stamp Celebrate release . Wedding card? Covered! Dads and Grads? Covered! This release has it all! If you would like to see all the amazing new goodies just click HERE! I have made a fun whimsical wedding card using the new Fancy Happy Ever After die because next to birthday cards, its my most requested type of card. I made this card using an A2 size card base from smooth white cardstock. I then die cut a wonky stitched panel from more white cardstock and ink blended some splotches here and there for a fun background to showcase the new Happy Ever After die from this new release. I die cut that twice. Once from white cardstock and once from matte gold cardstock and adhered them together a bit off-set so the gold peeks out a bit. I popped that up with a few foam squares. I then die cut a few flowers from more white cardstock from my stash and added them above and b...

Tim Holtz Stencil It!

Image
Hi all and welcome to another week of the  Simon Says Stamp Wednesday Challenge . This week's challenge theme is Stencil It! We are featuring products from the amazing Tim Holtz . You don't have to use them to join in but if you have some we would to see what you make. As always just for entering you will be eligible for the drawing of a  $25 voucher to the Simon store . Do you love to use a stencil to create a background? I do! I especially love to combine stencils with Tim Holtz amazing line of distress inks and oxides. The possibilities are endless! On a panel of white cardstock I created a background using the Simon Says Stamp Lattice Tile stencil and Tim Holtz Pumice Stone distress oxide . I laid the stencil on an grip mat and using a blending brush adding the ink all over the stencil. I then trimmed it down to fit an A2 size card base leave a bit of a white border. I then die cut several flowers from the Simon Says Stamp Aurora Blooms die set out of scraps of colored car...

Lawn Fawn Interactive

Image
Hi all and welcome to another week of the  Simon Says Stamp Wednesday Challenge . This week's challenge theme is to make an    Interactive card We are featuring products from Law Fawn . You don't have to use them to join in but if you have some we would to see what you make. As always just for entering you will be eligible for the drawing of a  $25 voucher to the Simon store . Lawn Fawn has so many wonderful dies and stamps to make an interactive projects. I have to admit that I have struggled to create projects with lots of moving parts. I chose the Lawn Fawn Magic Picture die and I was surprised how easy it came together. Lots of fun making it too. I made this card using an A2 sized card base cut from smooth white cardstock. I then trimmed down another piece of white cardstock to leave a bit of a border. I ink blended the top and bottom using oxide inks. I then die cut the pieces of the Magic Picture die from white cardstock and ink blended the pieces using the s...

Mother's Day Tag

Image
Are you loving the new Simon Says Stamp Be Bold release ? I just fell in love with the Pretty Petals layering stamp set ! I wanted a tag to tie to a present for Mother's Day to make it extra special. I'll share how I made it.. I wanted to make my own tag using a paper trimmer and an old corner chomper that I've had in my stash for about 15 years! Don't worry, I have added a tag die to the supply list that is similar. I cut the tag from smooth white cardstock. I used some pink ink and a blender brush to add a bit of color to the tag. I then ink splattered it with black ink for some interest. Using the new Pretty Petals stamp set I stamped all the sizes of flowers from the set using more shade of pink. I then fussy cut them out and added them to the tag with foam squares. I used a fine lined black pen to dray stems. I then stamped the sentiment in pink ink and used the coordinating die to cut it out and added it underneath the blooms. I used some white ribbon and baker...

Simon Says Stamp Happy Birthday!

Image
Hi all and welcome to another week of the  Simon Says Stamp Wednesday Challenge . This week's challenge theme is    Happy Birthday! We are featuring products from Hero Arts. You don't have to use them to join in but if you have some we would to see what you make. As always just for entering you will be eligible for the drawing of a $50.00 gift certificate to the Simon Says Stamp store. Simon Says Stamp is celebrating their 15th birthday this week! So I hope you love the festive project I have made for this occasion. I used the Simon Says Stamp exclusive Birthday Confetti die .  Super easy to make! I began with an A2 size card base made from smooth white cardstock. I then trimmed down another piece of white cardstock to create an ink blended panel. Starting in the upper corner I used a purple oxide, then a pink and into an orange blend with a blender brush. I then used a paintbrush to flick water and white paint over the ink blended panel. I then die cut the birthday ...