Posts

Showing posts from February, 2024

Spellbinder's Anything Goes

Image
Hi all and welcome to another week of the  Simon Says Stamp Wednesday Challenge . This week's challenge theme is  Anything Goes!   We are featuring products from Spellbinder's . You don't have to use them to join in but if you have some we would to see what you make. As always just for entering you will be eligible for the drawing of a  $25 voucher to the Simon store . It's such a treat to create projects using dies from Spellbinder's! I have had my eye on the Spellbinder's Seve a Slice die set for a while! It is so stinking cute! I wanted to create a sweet birthday card for the challenge this week. I made this card with an A2 size card base from smooth white cardstock. I then trimmed down a piece of cream cardstock to leave a white border. Using the Serve a Slice dies I cut several slices of pies from more cream and red cardstock. I used a sponge dauber and distress ink to add dimension to the pie pieces before I glued each pie slice together. I then die cut t...

Tulip Stem Birthday card

Image
You might have seen the acronym CAS pop up here and there. It means Clean And Simple. My favorite kind of card. A Clean and Simple card does not have be so simple. I made this card into a fun shaker card using the new Tulip Stem die  from the Simon Says Stamp Splendor release .  I began with an A2 size card base made from smooth white cardstock. I then used a wonky stitched rectangle die to cut a panel. I then centered the tulip die and ran it through the die cut machine. I glued acetate to the back of the tulip window and added foam strips to create the shaker element. I then ink blended the card base using oxide inks to show through the tulip window. I added sequins to shake around. The sentiment is from a banner stamp set that unfortunately has been discontinued but I'm sure you can find something similar in the Simon shop. I hope you enjoyed this project and got some inspiration. I have listed and linked the supplies I have used below for your convenience. Happy crafting!!...

Paper Rose Beautiful Blooms

Image
Hi all and welcome to another week of the  Simon Says Stamp Wednesday Challenge . This week's challenge theme is  Beautiful Blooms .  We are featuring products from Paper Rose . You don't have to use them to join in but if you have some we would to see what you make. As always just for entering you will be eligible for the drawing of a  $25 voucher to the Simon store . What a wonderful theme this week! I love adding flowers to my projects. I needed a beautiful background to showcase these blooms. I chose the Paper Rose Baby Blue embossing folder to provide gorgeous texture behind the flower dies. I began with an A2 size card base made from smooth white cardstock. I trimmed down a panel from more white cardstock that I ran through the Paper Rose Baby Blue embossing folder . I adhered that panel to the front of my card base. I then ran white cardstock through the same embossing folder but this time I added blue oxide ink to the flat inside of the folder to add color t...

Fine Floral Stem Birthday card

Image
Hello crafty friends! Today I want to share a technique of combining distress ink, oxides and copic coloring. It's fun to combine your favorite mediums for adding color to your projects. I'm also showcasing the Fine Floral Stem one of my favorite dies from the new Simon Says Stamp Splendor release . This card was made with an A2 size card base from smooth white cardstock. I trimmed another panel of white cardstock down to leave a bit of a border on the card base. I used distress oxide inks to add color to the corners of the panel. I then smudged the distress inks pads on to an acrylic block and sprayed it with a bit of water to splatter on the ink blended panel with a paint brush.  I then die cut the flowers and leaves from white cardstock. Using copic markers and a "flicking" technique I added color to the leaves and the flowers. The centers of the flowers was colored in with a yellow marker and arranged on the panel with 3d foam squared. I then die cut the Happy Bi...

Simon Says Stamp Splendor release blog hop - day 2

Image
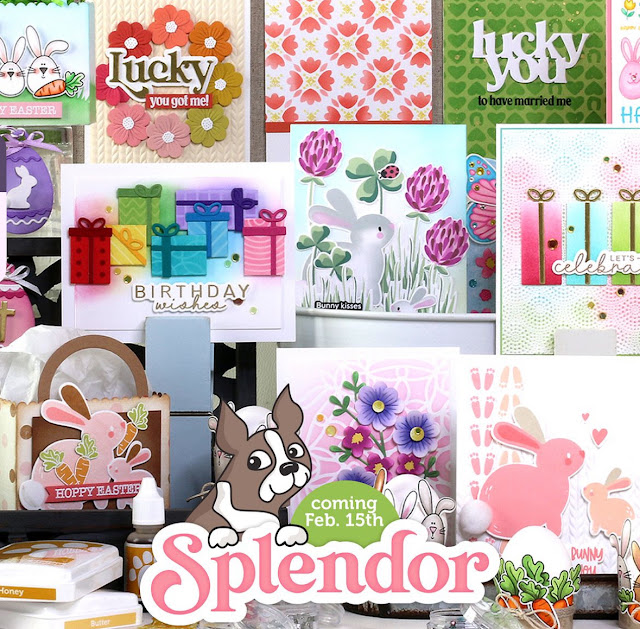
I'm happy to be participating in day 2 of the new Simon Says Stamp Splendor release  blog hop. I am sharing a couple of fun easter projects using some goodies from this release. Make sure to take advantage of the special hop promotion! πŸ‘†πŸ‘†πŸ‘†Also, Simon is giving away a $25 shopping spree to a lucky winner! The winner will be picked from the comments left along the hop. Each comment you leave will be an entry into the drawing. Good luck!! I have used the new Gift Bag die to create fun Easter themed treat bags.  This project was made using the Bunny Kisses stamp set and coordinating dies . I stamped the bunnies in pink and gray inks and the die cut them out and popped them up on the treat bag using 3d foam squares. I also die cut a few flowers and arrange them around the bunnies. For the next treat bag I trimmed out a pink cardstock rectangle for the background and adhered it using liquid glue. I then die cut the Fancy Happy Easter die from white and yellow cardstock. I then ...

Simon Says Stamp new Splendor release day

Image
It's release day! I'm happy to be sharing a few projects made with some of the amazing products from the new Simon Says Stamp Splendor release . I made this first card using an A2 size card base cut from smooth white cardstock. I then took a piece of cream colored cardstock and trimmed it down to fun through the new Neatly Knitted embossing folder . I then trimmed down the panel to leave a bit of a white border. I then die cut flowers from the new Fine Floral Stem die set. I cut each flower twice from colored cardstock in my stash and adhered to the cream panel in a circle. I used 3d foam squares to pop them up. I finished this card of with the new Fancy Lucky die cut from gold cardstock and mounted on the shadow cut from white cardstock. This next card I had to create a DIY plaid background panel to showcase the adorable new Gift Builder die cut from more scraps of colored cardstock and mounted on the card with 3d foam squares. I added a few sequins for a bit of sparkle. Las...

Gina k Designs Fun with Foil

Image
Hi all and welcome to another week of the  Simon Says Stamp Wednesday Challenge . This week's challenge theme is  Fun with Foil .  We are featuring products from Gina K Designs . You don't have to use them to join in but if you have some we would to see what you make. As always just for entering you will be eligible for the drawing of a  $25 voucher to the Simon store . Want some over the top color and shine? I have a wonderful combination of alcohol ink and foil sheets. I am using the Gina K Design Sparkling Silver Fancy Foil for this challenge. I made this card using an A2 size card base from smooth white cardstock. I then cut a panel of white cardstock using the wonky stitched rectangle die. From that panel I cut out each of the Fancy Feathers . I then cut two more sets of the feathers from white cardstock for thickness. I created the shiny colorful background using the silver foil . I then dropped each color of the rainbow onto the foil using alcohol inks and us...

Simon Says Stamp March Card Kit

Image
I'm happy to share a couple of projects I made using the Simon Says Stamp March Card Kit . This kit was packed full of fun goodies to play with including two action wobblers! I have made two interactive cards to share with you! Make sure you grab this kit before it's gone! I made this card with an A2 size card base made from smooth white cardstock. I then die cut another piece of white cardstock to create a wonky stitched panel. I used distress inks to ink blend a background for the butterfly. I stamped the butterfly image from the Simon Says Stamp Mix & Match Butterflies stamp and die set from the kit using versamark ink and heat embossed with gold embossing powder. I then used my Karin brush markers to color in the butterfly. I fussy cut it out (there are coordinating dies available) and adhered it to the card using one of the action wobblers. The sentiment is also from the stamp set. I made this second card with an A2 size card base with smooth white cardstock. I then c...