Posts

Showing posts from May, 2025

Simon Says Stamp Moments in Time Blog Hop ~ Day 1

Image
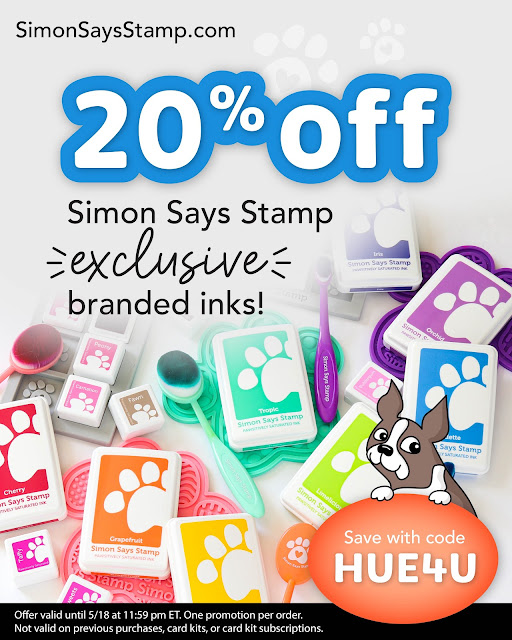
I'm so happy to be participating in day 1 of the Simon Says Stamp Moments in Time blog hop.  I am sharing a couple of projects for this fun hop. Don't miss the special offer for the blog hop today๐Ÿ‘‡๐Ÿ‘‡ Simon is also giving away a $25 shopping spree to a lucky winner! The winner will be picked from the comments left along the hop and announced on June 4th. Each comment you leave will be an entry into the drawing. ๐Ÿ‘‰ PLEASE NOTE:   If you want to leave a comment on this post, make sure you   include your name   so we can reach you if you are selected for the giveaway!  First up is a color filled project featuring the new  Dainty Floral Vine  and the new  Giggle Hugs die . I die cut a panel of white cardstock using the wonky stitched rectangles dies to fit an A2 size card base to leave a bit of a white border. I then used distress inks to blend the top and bottom corners of the panel. I adhered that to the card base. Next, I die cut the vine and flow...

Simon Says Stamp Moments in Time release day

Image
It's release day! I am sharing a project featuring the new Happy Cover die from the new Simon Says Stamp Moments in Time release. Click HERE to see the entire release. I die cut the Happy Cover die from thick white cardstock. I popped out the letters and used distress ink to color them. I then adhered it to a piece of acetate and added foam strips on each side of the rectangle frame of the die to create the shaker element.  I added the shaker bits and adhered a gray A2 size card base to the foam strips. I then die cut the Sweet die from white cardstock and used more distress ink to color it. I also applied clear embossing ink over the top and heat set it with clear ink for lots of shine. I stamped the word birthday in hot pink ink and also heat embossed it with clear ink for more shine. I cut it out with a tag die and adhered it to the card along with the Sweet sentiment. I hope you enjoyed the project I made and got some inspiration.  I provided affiliate links to all the ...

Studio Light Anything Goes

Image
Hi all and welcome to another week of the  Simon Says Stamp Wednesday Challenge . This week's challenge them ~  Anything Goes! We are featuring products from Studio Light . You don't have to use them to join in but if you have some we would to see what you make. As always just for entering you will be eligible for the drawing of a  $25 voucher to the Simon store! This week I am featuring the amazing Studio Light Gold, Silver and Rose Foil cardstock pad . I love to add a bit of sparkle or shine to my projects and this pad is perfect! I began this project by taking a ruler and 4 colors of copic markers to create a plaid background on white cardstock. I trimmed it down to fit an A2 size card base made from smooth white cardstock.  I then die cut the flower head from white cardstock and the stem and leaves from green cardstock. I then die cut the sentiment from the gold foil cardstock and white cardstock 2 times and adhered together for thickness. I added the arched fram...

Simon Says Stamp Bright and Cheerful

Image
 Hi all and welcome to another week of the  Simon Says Stamp Wednesday Challenge . This week's challenge them is    Bright and Cheerful! We are featuring exclusive products from Simon Says Stamp . You don't have to use them to join in but if you have some we would to see what you make. As always just for entering you will be eligible for the drawing of a  $25 voucher to the Simon store! This week I am featuring gorgeous Simon Says Stamp Zippy Zinnias emboss and cut folder . I just love Simon's 3d embossing folders especially when it includes a die to make it even more dimensional! I began with a panel of white cardstock trimmed down to leave a bit of a border on an A2 size card base. I ran it through the 3d embossing folder. I then began to color each of the blooms with copic markers. I used one of the three dies that are included to cut out a flower and pop it up off the card using 3d foam squares. I ink blended the edges of the panel with light gray distr...

Missing You Daisies

Image
Hello crafty friends! I am digging into my stash of crafty goodies to create a simple but fun project. I am playing Dr. Frankenstein with my die sets to create a unique floral card. I love mixing die sets to come up with something unique and fresh.  I began by making my daisy heads. I cut the smaller flower from the Cosmos Due die set twice from white cardstock. I layered them together with liquid glue. I just slightly would rotate the two flowers before glueing them together for a fuller look. I then die cut the centers of the flowers out of orange cardstock. I made 4 daisy heads. I then used the leaves from the Bubble Flower and Leaves die set because I loved that it had lots of sizes of leaves that I could cut all at once! I cut those from light green cardstock. I then created a yellow cardstock panel using a square die. I arranged the daisies, stems and leaves on the panel with liquid glue and foam squares. I used some scrap cardstock to layered under the square yellow panel fo...

Simon Says Stamp Pawsitively Saturated Ink Blog Hop

Image
Hello crafty friends! I'm happy to be participating in Simon Says Stamp's Pawsitively Saturated Ink Blog Hop. There is a special discount offered for these gorgeous inks๐Ÿ‘‡๐Ÿ‘‡ I have created a fun and colorful birthday card using some of my favorite Pawsitively Saturated Inks. I have a quick tutorial over on my Instagram Page showing how I created this background. I began with a quarter sheet of white cardstock. I placed the stencil over the top and starting from the center and added yellow ink with a blending brush. I repeated this process as I radiated out with green and then blue. I then removed the stencil and used a lighter shade of each ink to blend over the darker pattern until the whole panel was covered. I then replaced the stencil over the panel but shifted it just a little center and taped it down to add a clear shiny texture glaze over the entire panel. When it was dry I added the sentiment that was die cut from more ink blended white cardstock in pinks and reds fo...

Pretty Pink Posh May release and giveaway

Image
I am happy to be sharing a few projects I have made using the new goodies from the Pretty Pink Posh May release . I am also participating in the Day 5 of the Instagram Hop and giveaway celebrating this release. This first project features the new Floral Wreath Builder die set . I also used texture paste and a brick stencil to create a white textured background to let the colors pop. The sentiment is from the new Friend Greetings stamp set . Next, I created a sweet little scene by stamping the images from the Tea Time stamp set. They have coordinating dies available but I fussy cut them out and added them to a oval eyelet frame. The background was created by ink blending the layers of the Layered Teacup stencil set . Last, I made a fun shaker card featuring the Tea Cup shaker die. I cut it out of white cardstock, clear acetate and brown cardstock. I filled it with shaker bits that looked like a hot beverage. Su fun to give to the recipient who loves a good cut of tea!  GIVEAWAY: I...

Memory Box Things With Wings

Image
Hi all and welcome to another week of the  Simon Says Stamp Wednesday Challenge . This week's challenge them is    Things with Wings! We are featuring products from Memory Box . You don't have to use them to join in but if you have some we would to see what you make. As always just for entering you will be eligible for the drawing of a  $25 voucher to the Simon store! This week I am featuring the Memory Box Ethereal Butterflies die set . I wanted the butterflies to pop off the card with the bold colors on a white backgrouond. The background is a piece of white cardstock that I ran through a 3d embossing folder. I trimmed it down and added to an A2 size card base. I then die cut several of the butterfly images from the die set and colored them using copic markers. I then die cut the bodies of the butterflies from silver glitter cardstock and added them to the center of the butterflies with liquid glue. I arranged the butterflies on the card with foam squares to m...